From the professional academic reports to the market media kit materials, or a personal resume, PDF file is ubiquitous. Why? Mostly because it preserves the document formatting, content perfectly in all the devices, screens or systems. And we can easily create an eye-catching digital file, and the receiver only needs a free PDF reader to view the original content. But let’s face it, if you provide a marketing material on your website which is 50MB or larger, nobody would like to download it. PDF files can be bloated if there are too many high-quality images within the content. Here comes a question, is there any way to shrink the PDF file size, so we can make a PDF smaller without ruining the original quality?
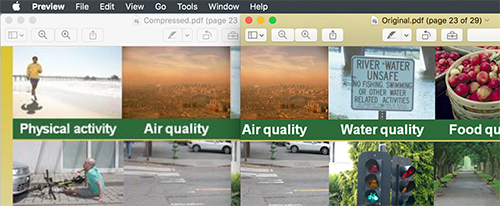
In this tutorial, we will show you how to reduce the size of PDF on Mac, using Preview, online service and 3rd party application. But please note that if your PDF file is text-base, and doesn’t contain any image elements, there are no ways to compress PDF file size.
Method 1: Using Preview to reduce PDF size
Preview is the built-in application on OS X, it can handle most of your basic PDF needs, including reducing PDF file size. It mainly uses the ‘Quartz Filter’ to compress a PDF.
Simply open a PDF file with Preview, click on ‘File’ -> ‘Export’ on the menu bar. In the pop-up window, select ‘Reduce file size’ in Quartz Filter setting, which is under the Format setting.
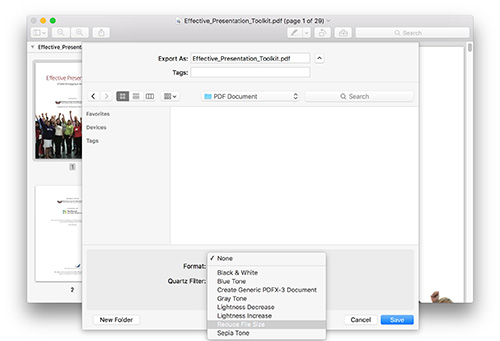
Pros: Using the built-in Preview, you don’t need to spend extra money on making a PDF smaller. It’s built-in Application, reliable, free and quick.
Cons: Preview uses a preset filter to reduce PDF file size on mac, which reduce PDF file size mainly by reducing the image quality and dpi. So you don’t know how image quality drops, sometimes your PDF file may become blurry after compression. Especially for those scanned paper with small font size.
Method 2: Shrink PDF file size with Compress PDF for Mac
Compress PDF for Mac is a lightweight application developed by Lighten Software. It lets you decide the compressing option. You can compress the images to low quality (50 dpi) if you like, or compress PDF without compromising much image quality (600 dpi, high quality). So you can always find the balance between image quality and file size reduction.
Simply drag and drop PDF files to the file area, the file will attempt to reduce PDF file size instantly by default option. You can see the file size and view the file after compression. If you are not satisfied with the pdf reduction, you can select a lower quality and smaller dpi. If you are not satisfied with the image quality, you can select higher quality and higher dpi settings.
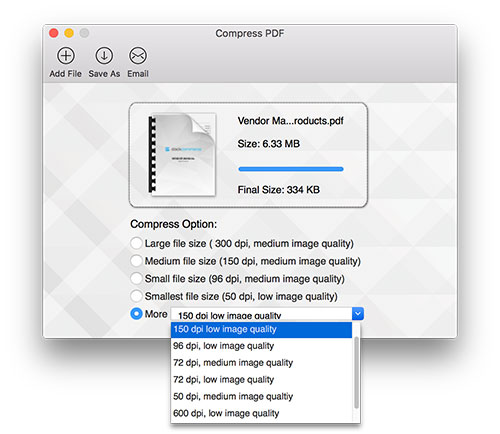
Pros: Quick offline application, easy-to-use. You can control the compression setting as you like, you can create your own optimal balance of compression and quality.
Cons: It costs $3.99, not free.
Method 3: Shrink PDF file by uploading PDF to online PDF compressor
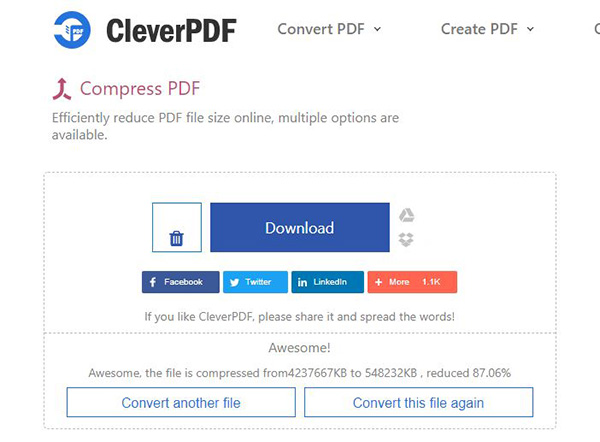
CleverPDF.com is a great PDF utility website, which lets you compress PDF online. Go to CleverPDF.com, select ‘Compress PDF’. Simply drag and drop your PDF file to the file area, wait a few seconds for uploading (depending on your PDF file size), you can also add PDF file from your Dropbox or Google Drive. After uploading it will start compressing PDF file instantly. If the output file is not small enough, you can still change other compressing options.
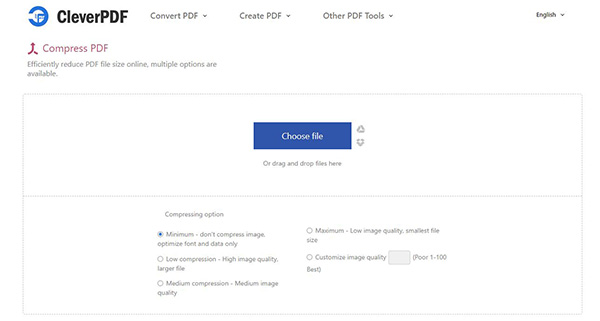
Wait for a while, you can download the compressed PDF file directly.
Pros: It’s an easy-to-use free online PDF compressor app, doesn’t require email or any of your information, you can download the app directly after compression. It’s cross-platform, no matter you are on Windows, Mac, Linux or any devices, it can compress your PDF file if you can connect to the Internet. Besides PDF compressing, it also offers 20 other PDF tools for free.
Cons: You need to upload your file online, which requires an Internet connection, the upload speed depends on your file size.
Now you have the knowledge to compress PDF file size. What do you use to compress PDFs while preserving image quality?
